
Not installed yet? Install the editor first — it also says what spelling and git need on your system.
This walks you through a first session, in order. Each step is a few keys; the pages linked at the end of each go deeper when you want them.
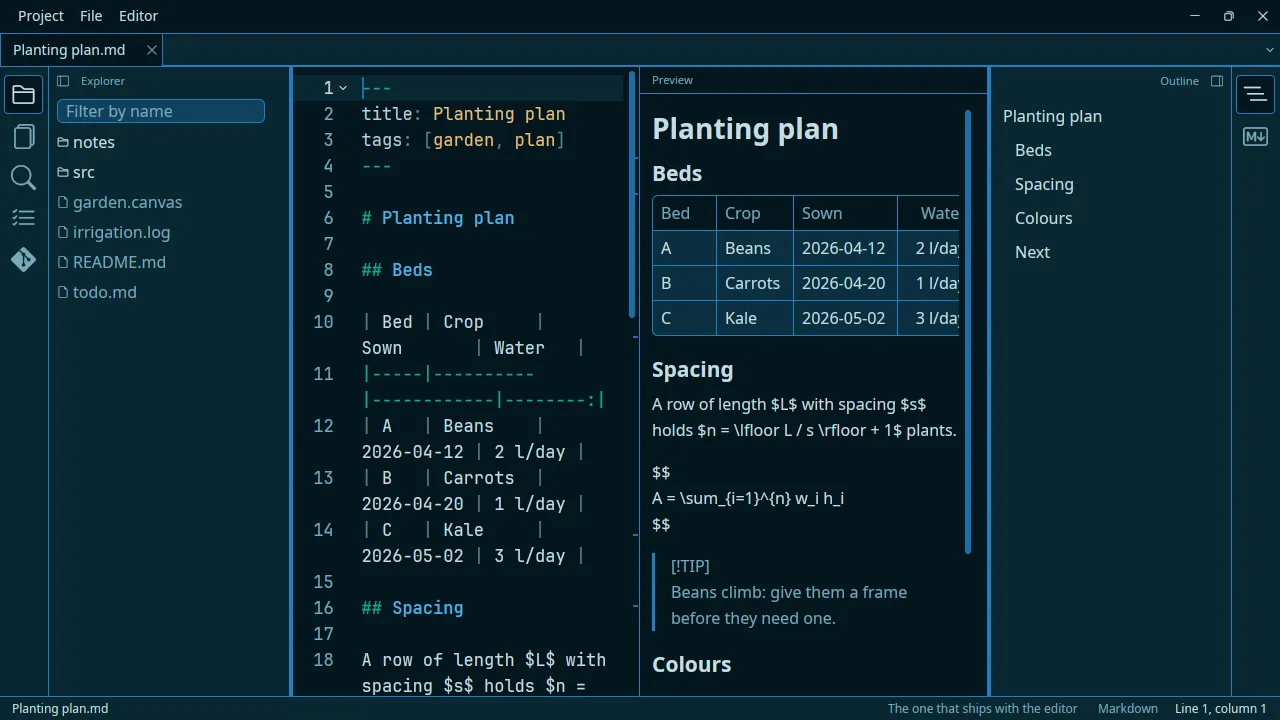
1. Open a project
Start the editor with no file — kaivalya-editor, or the launcher. The start
screen lists your recent projects; choose Open a folder… and pick the folder
your notes are in. That folder is now the project: the explorer on the left
shows it, and everything below works across it.
Next time, the same screen offers it under Carry on with, with the files you had open.
2. Write a note
Ctrl+N makes a new file and Ctrl+S saves it: call it Garden.md. Then
write:
# Garden

## Beds
Under Beds, on an empty line, type /. A list opens at the cursor: this
is the / palette. Type tab and press Enter — the
table window opens. Fill in a few cells, press Apply, and a lined-up
markdown table is written into your note.
A few more things to try on the next lines:
- select a word and
Ctrl+Bfor bold; /mathwrites a formula block, andCtrl+Shift+Lwith the cursor in it opens the formula window, which draws the formula as you build it;- in a list,
Enterstarts the next item, andEnteron an empty one ends the list; /datewrites today’s date.
3. See it rendered
Ctrl+Shift+B puts the live preview beside the text; it follows what you
type and where your cursor is. Ctrl+Shift+V shows the preview alone, and the
same key brings the text back.
4. See it as a reader will — the heavy preview
The live preview is drawn in the editor’s own theme, for writing against. The heavy preview is the other one: a window of its own that draws the note the way a browser would — your stylesheet as you wrote it, the formula typeset, tables and mermaid diagrams for real.
Press Ctrl+Shift+P, or Open in the heavy preview in the markdown
pane. The window follows what you type and keeps your place, and it shows
whichever tab is in front. Escape closes it; so does the same key again.
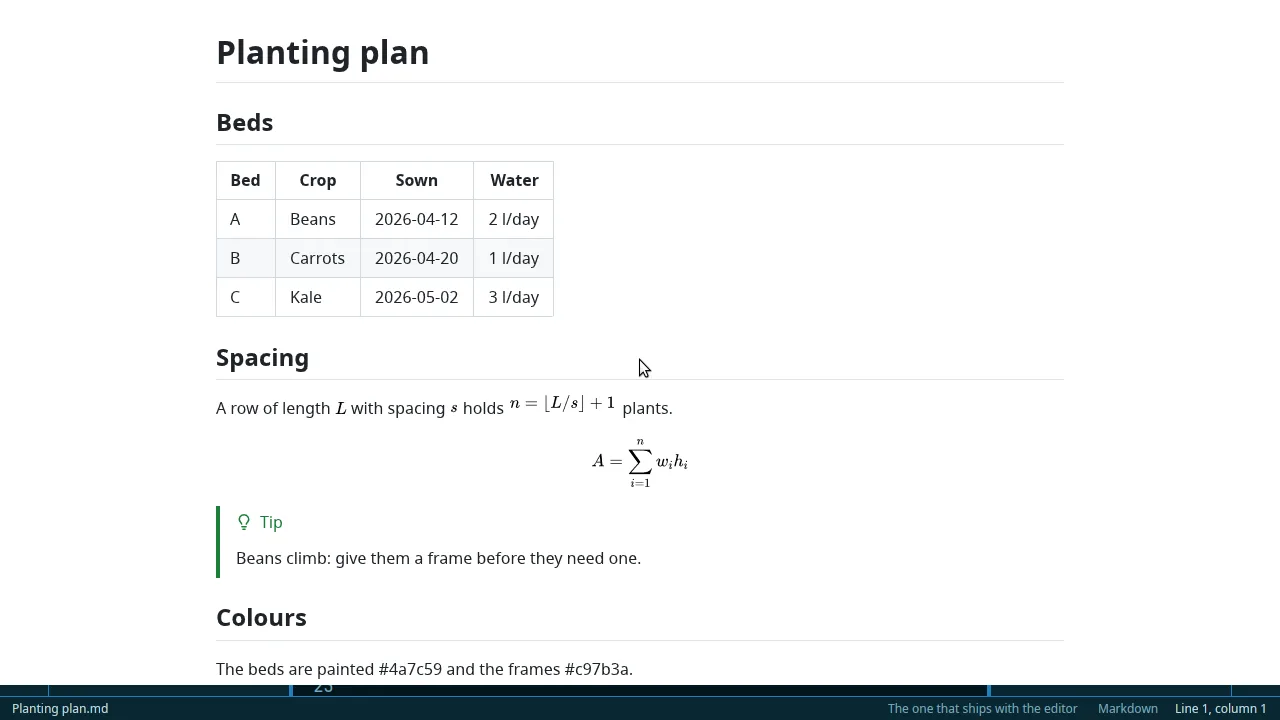
Open it when the question is what will this look like to somebody else — before you send a note, export it, or try a new stylesheet. Keep the live preview for the rest: it costs nothing, and the heavy one holds a renderer in memory while it is open. Nothing to install: it comes with the editor. Why there are two, and what each can and cannot draw: Previews and exports and The heavy preview.
5. Find your way
Ctrl+Pand a few letters of a file’s name opens it.Ctrl+Shift+Fsearches every file of the project.Ctrl+Shift+Olists the note’s headings; click one to go there.- The icons on the left rail open the panes — the TODO pane gathers every
TODOin your files and every unticked- [ ].
The User guide shows them all, with a picture of each.
6. Keep it
Save with Ctrl+S. If the folder is a git repository, the rail’s git icon lists
what changed: write a message and press Commit. Every save also keeps a
version of the file on your machine — File › Local history.
7. Make it yours
Ctrl+, opens your settings file, where every option says what it does —
font sizes, the theme, which panes show and where. See
Change a setting, Add a theme,
Add a stylesheet and Add a template.
Moving around the text
Home / End |
the start and the end of the line |
Ctrl+Home / Ctrl+End |
the start and the end of the file |
Ctrl+Shift+Home / Ctrl+Shift+End |
the same, selecting on the way |
Ctrl+← / Ctrl+→ |
a word at a time |
Page Up / Page Down |
a screen at a time |
F6 / Shift+F6 |
the keyboard into the panes, and back to the text |
Every other key is in Keyboard shortcuts.